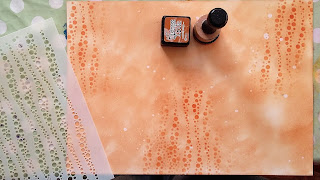
This post is photoheavy! A step by step building up those layers ....
1. I used tea dye distress ink and covered the page ...next I used a dutch doobadoo stencil and created some patterns....
2. Next it was another dutch doobadoo stencil and another di...
3. a visible image stencil ...
4. a TH stencil - mini scale....
5. another TH stencil ...
6. after a little masking a final TH stencil...
and my background was complete!
I teamed this with a TH stamp stampers-anonymous-tim-holtz-cling-mounted-stamp-set---evolution.
I hope you enjoyed seeing how I have used my stencils and will join us in using yours!
Big hugs
Rachel xx


Fabulous card Rachel, love it
ReplyDeleteLove this design. Must try this thanks for the inspiration Zoe x
ReplyDeleteThis is absolutely gorgeous, gorgeous colours and design. Big Hugs Marlene
ReplyDeleteWow ! love it !
ReplyDeleteCorrie x
WOW fabulous background and stencils
ReplyDeleteCarol x
Your stencilled background is amazing Rachel, love the colour and the design and of course the Gent looks great too! Hugs, Anne xx
ReplyDeleteFabulous stencilled background and gorgeous colours. A wonderful project.
ReplyDeleteHugs
Linda xxx
A fabulous card Rachel, you have used some great stencils.
ReplyDeletePauline - Crafting with Cotnob
x
Wow Rachel what fantastic colours and design, love the stencils, they are brilliant great image, Kate x
ReplyDeleteThat layered stencilling is really fantastic, Rachel - an amazing background for the silhouette gentleman. Very cool rusty tones too.
ReplyDeleteAlison x
Fabulous !
ReplyDeleteCorrie x
This is wonderful, arty and so lovely!
ReplyDeleteI love seeing how you build up your stencilled masterboard! You do have lovely stencils, Rachel... The silhouette image is perfect against this background. xx
ReplyDeleteFantastic stencilling Rachel. A great masterboard and your card looks super. Barbxx
ReplyDeleteA fabulous gent ..love it. xx
ReplyDelete